
LENGTH: 330m | PAR: 4

LENGTH: 312m | PAR: 4

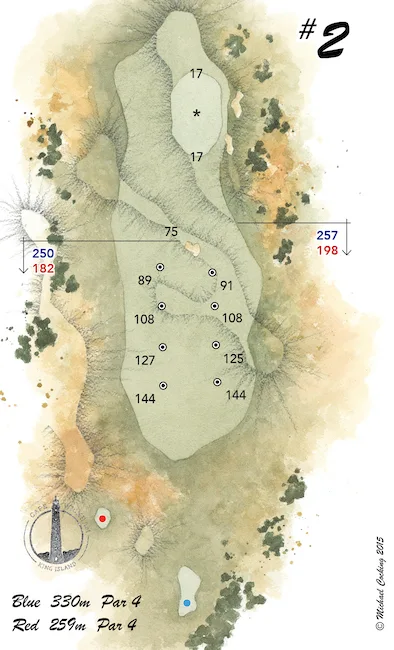
LENGTH: 259m | PAR: 4
Playing Tips
Hole 2 is an elegant par 4 that hugs the Cape Farewell coastline. Despite having one of the widest landing areas on the course, the tee shot glares into a bunker that is directly situated in the middle of the fairway. The safe play is to aim just left of the bunker; although your second shot then has to negotiate a steep depression short and left of the green. Playing for the percentages here is very wise, do not get dragged into flag hunting on this tough start at Cape Wickham Golf Links.
Pro’s Tip: There is so much room on the fairway, don’t overthink it and just get one away onto the short grass. For your second shot into the green, aiming just right of the flag would be ideal. The green does slope from right to left so it will kick in from that side. Aiming just right of the flag will also help avoid the severe run off slope on the left-hand side of the green. It can be a tricky up and down from the bottom of that hollow.
Please note: Seals are often seen frolicking in the waters around Cape Farewell, so be sure to check out the rocks right of the green as you may see them enjoying some sun.
Flyover Video
Where to next?
Book A Tee Time
Book your next game
at Cape Wickham Golf Links:
Play & Stay Packages
Discover our seasonal packages
and special offers: